How To Draw A Rosette
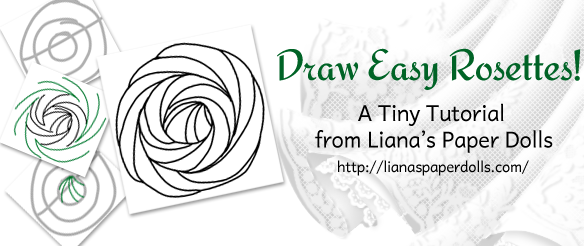
Welcome to my first Tiny Tutorial! In this series, I'll show you some of the tricks and techniques I use to create my dolls and dresses. First, let's draw some rosettes.
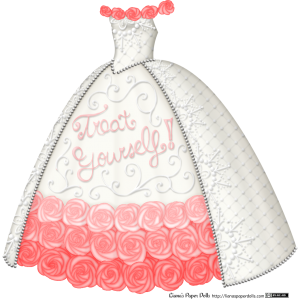 First off, let's revisit the Broken Age cake dress from last Friday. The rosettes on the bodice and hem were meant to look like they were piped on with frosting, in the style of popular ombre rosette cakes. If you use Pinterest, I am quite sure you have scrolled past these cakes several times! The one I referenced was this purple specimen. The technique for drawing rosettes can be adapted for other things: look at these quinceañera gowns and this pink gown, isn't it basically just a similar idea? It also makes a good border, especially since you can draw it quickly. It won't look like a row of roses, but it doesn't have to.
I did this with an iPad program, Procreate, that allows layers, so the guidelines are on a different layer than the finished drawing, and once I'm done I just delete that layer. You could mimic this by putting down guidelines with pencil and the actual rosette with pen, or wing it without guidelines.
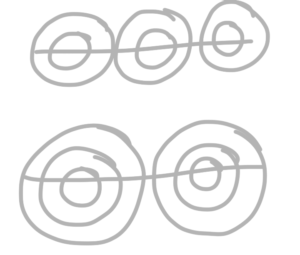 To start, draw the guideline along which your rosettes will be placed, then decide on the size of your rosettes. For small ones, draw an olive: two circles, one smaller than the other. For large ones, draw a bullseye: three circles. Repeat the pattern so that the edges are just about touching. (Don't worry about whether they overlap or not. These are just guidelines.)
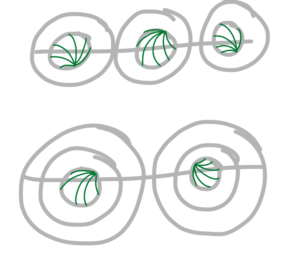 Draw 5-6 curved lines within the smallest circle. Start the lines from a single point on the edge of the circle and end them on different parts of the edge of the circle. The finished lines will look like a seashell.
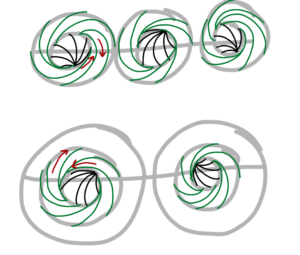 Starting with the inside line of the second circle, draw curved lines towards the outside of the circle. Unlike the previous rosette, you don't want them to start on the same point: you might have two or three starting on the same point, but not all of them. You'll want to draw the lines the opposite direction from the lines on the middle circle. They shouldn't be all the same width, like a camera shutter.
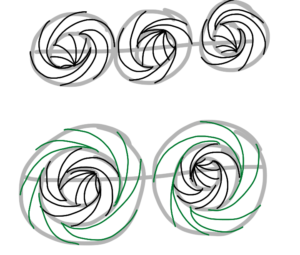 If you're making a large rosette, then repeat the process for the large circle. Again, be sure to draw the lines going in the opposite direction from the previous level.
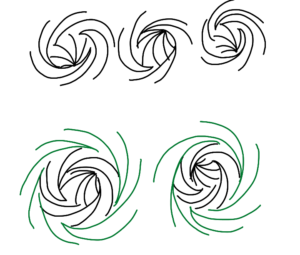 Remove the guidelines, and you have what look like a row of starbursts.
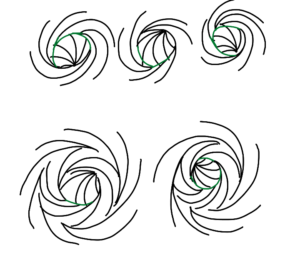 Now you'll go in and connect the areas that were left blank when you took away the guidelines. Start with the middle circle. If you're doing three-circle rosettes, draw in the missing lines in the second circle too.
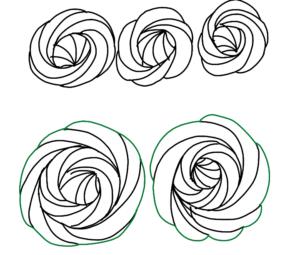 Next, draw the outside lines. When doing the outside lines of a rosette, draw a gentle arch continuing the end of one line to the end of the next one to form the petals.
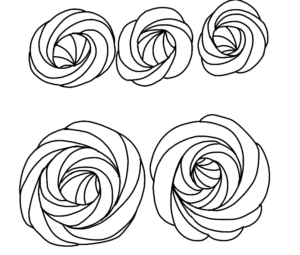 Clean up the lines and you have your rosettes!
If you try out this style of drawing rosettes, I'd love to see the results. By and by I'd like to do some more in-depth tutorials about how I color and so on, but tutorials like these, where I isolate one part of my technique, are easier to do. If you can think of a technique I've used in a previous dress that you'd like to know about, post a comment and I'll add it to my list of tutorial ideas!
Tiny Tutorial #2 will show you how I created the diadem from the recent ancient Greek peplos. As always, you can follow me on Facebook, Twitter and Pinterest for updates, paper doll related thoughts and pictures of 1910s gowns. If you enjoy my work, I'd also appreciate your support through Patreon.
How To Draw A Rosette
Source: https://lianaspaperdolls.com/2014/03/17/tiny-tutorial-1-draw-easy-rosettes/
Posted by: lomaxpoccour.blogspot.com

0 Response to "How To Draw A Rosette"
Post a Comment